Home Soda and Seltzer Carbonatin kits are extremely easy to use and allow you to make great-tasting carbonated beverages at home within minutes! We offer a variety of soda and seltzer-making kits for various applications and space constraints. We offer kits that carbonate in plastic 1 & 2-liter soda bottles that you would buy in the grocery store. These make it extremely easy to recycle bottles you likely are already buying and reuse them for your own homemade soda and seltzer water! We also offer mini-kegs that are fully stainless steel for carbonating in. Some people don't like using plastic and are looking for alternatives to making carbonated beverages at home. These stainless steel growlers AKA mini-kegs, come in a few sizes, starting at 2L and going up to 8L (2 Gallons)! The wonderful thing about the mini-keg seltzer-making kits is that your container stays pressurized for the life of the beverage inside. You never unscrew the cap to dispense. Simply pull the draft tap handle on the top of the stainless steel seltzer dispenser, and out comes your perfectly carbonated beverage!
A couple of very important things to note when trying to force carbonate:
- Make sure your liquid is ice-cold. CO2 absorbs better and more quickly in cold liquids.
- CO2 takes time to absorb into liquid. The methods below help to speed up the process, but if you can leave under pressure for longer periods of time, you will start to see higher levels of carbonation in your beverages!
 Setup Instructions: Home Soda Carbonation Kit with Plastic Bottle
- Ensure you have the appropriate bottle. Standard 1 and 2L soda bottles from the grocery store work great.
Never use glass bottles or other bottles with different threading than a standard soda bottle.
- Make sure the liquid you are going to carbonate is ice-cold! The colder the liquid, the better and quicker the CO2 will be absorbed into it.
- Pour the liquid you wish to carbonate into the bottle, leaving a little space at the top (a couple of inches is sufficient).
- Attach the Carbonator cap to the bottle, but do not tighten it all of the way down yet.
- Squeeze out excess air from the bottle so that the liquid level goes right up to the carbonation cap, and screw the cap down tight to seal it with little to no air left in the bottle.
- Turn on the CO2 and maintain pressure between 30 and 40 PSI.
- Attach your gas line and disconnect to the carbonation cap by pulling up on the outer ring of the disconnect and pressing down hard on the disconnect until it snaps down and the outer lock ring of the disconnect locks back down in place.
- Shake the bottle for about 1 minute to carbonate the beverage.
- Enjoy your carbonated beverage!
NOTE: you can repeat these steps a few times if you wish for higher levels of carbonation. Also, leaving your pressurized gas line attached to the bottle overnight, and in refrigerated temperatures will help to increase carbonation levels.
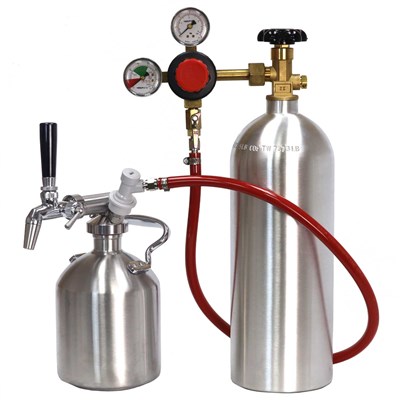 Setup Instructions: Home Seltzer Making Kit with Stainless Steel Mini-Keg
- Assemble your mini-keg seltzer dispenser:
- Attach the hose to the bottom of the dispenser head. The hose will stretch over the threaded portion.
- Place the dispenser on top of the mini-keg to the side of the opening allowing the hose to hang down alongside of the keg. Then cut the hose to the length needed to reach the bottom of the mini-keg.
- Attach the dispenser to the top of the mini-keg by screwing it down until tight.
- Attach the faucet to the front shank of the dispenser and use the deluxe faucet wrench to tighten the faucet in place.
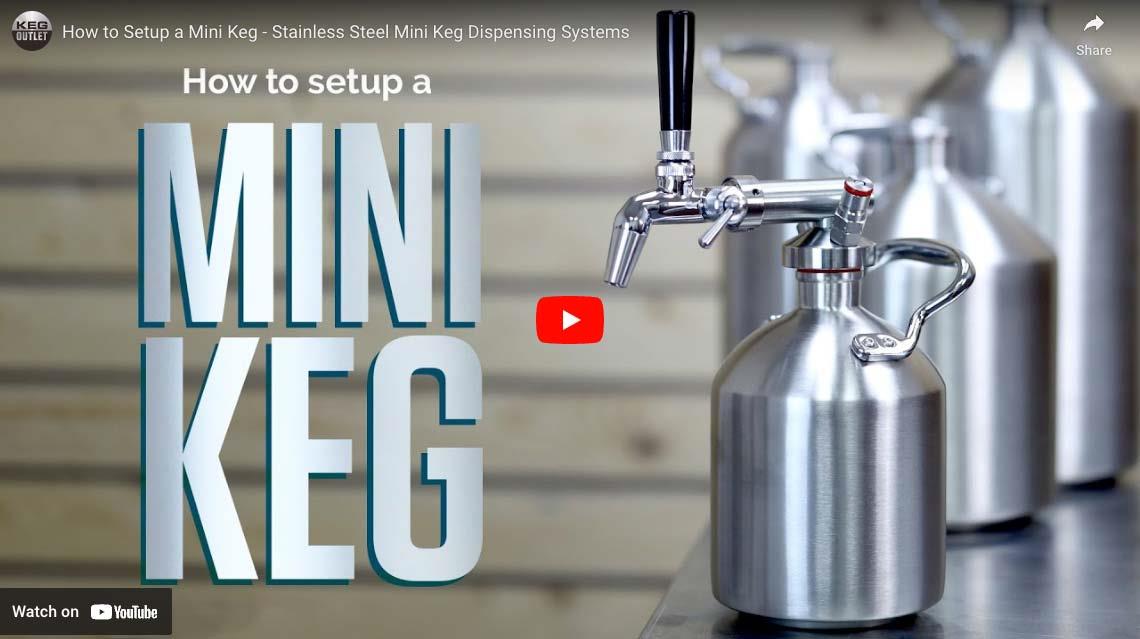
Click here to see a video on how to set up your stainless steel mini keg.
- Make sure the liquid you are going to carbonate is ice-cold! The colder the liquid, the better and quicker the CO2 will be absorbed into it.
- Pour the liquid you wish to carbonate into the stainless steel mini-keg, leaving a little space at the top (a couple of inches is sufficient).
Looking to make Homemade Topo Chico? Check out our Topa Topa Mineral Water Recipe Kit – Topo Chico Mineral Water Recipe Kit
- Screw on the top dispenser cap to the growler.
- Turn on the CO2 and set the output pressure to about 10 PSI.
- Attach your gas line with the gray disconnect to the gas-in post on your cap by pulling up on the outer ring of the disconnect and pressing down hard on the disconnect until it snaps down and the outer lock ring of the disconnect locks back down in place.
- Pull the pressure relief valve (PRV) a few times to purge any oxygen left in the mini-keg, so that it is replaced with CO2.
- Increase the pressure on the regulator to 35-40 PSI.
- At this point, you can leave the gas line attached to the mini-keg setup and in a refrigerator overnight or for longer and the CO2 will begin to carbonate your liquid.
OR if you would like to enjoy your carbonated beverage right away, shake the mini keg with the gas line attached to it for about a minute. You will hear the CO2 forcing its way into the liquid as you do this.
- Enjoy your carbonated beverage!
NOTE: you can repeat these steps a few times if you wish for higher levels of carbonation. Also, leaving your pressurized gas line attached to the bottle overnight, and in refrigerated temperatures will help to increase carbonation levels.